
Moody Home Studio Makeover
I have been using this design for almost 4 years and I getting really tried of it! It works fine for me, but there’re so many space for objects display and sometimes it get all mess up when the everyday use also the dust covered, if I'm getting too lazy for cleaning up (we all human and this is normal.) For everything I mentioned, it's the time for a change!

My old workspace which wasn’t for work but for display…
For the workspace style inspiration, I'm normally using Pinterest or watching other people doing the room makeover on YouTube. Then after I typed down the word "Workspace Makeover" on YouTube, this amazing channel shows up called "Becki and Chris." The title of "Turn Your BEDROOM Into A HOME STUDIO' "with a moody grey/ black editing style thumbnail suddenly caught my eyes. When you first go into their YouTube home page, you can notice how dark and moody their style is! It makes you super calm and mature feels, also minimalistic at the same time, and that is what I wish my dream studio looks like. Finally, after I finished the whole room makeover video, I decided to do the same style as them.

Work in progress
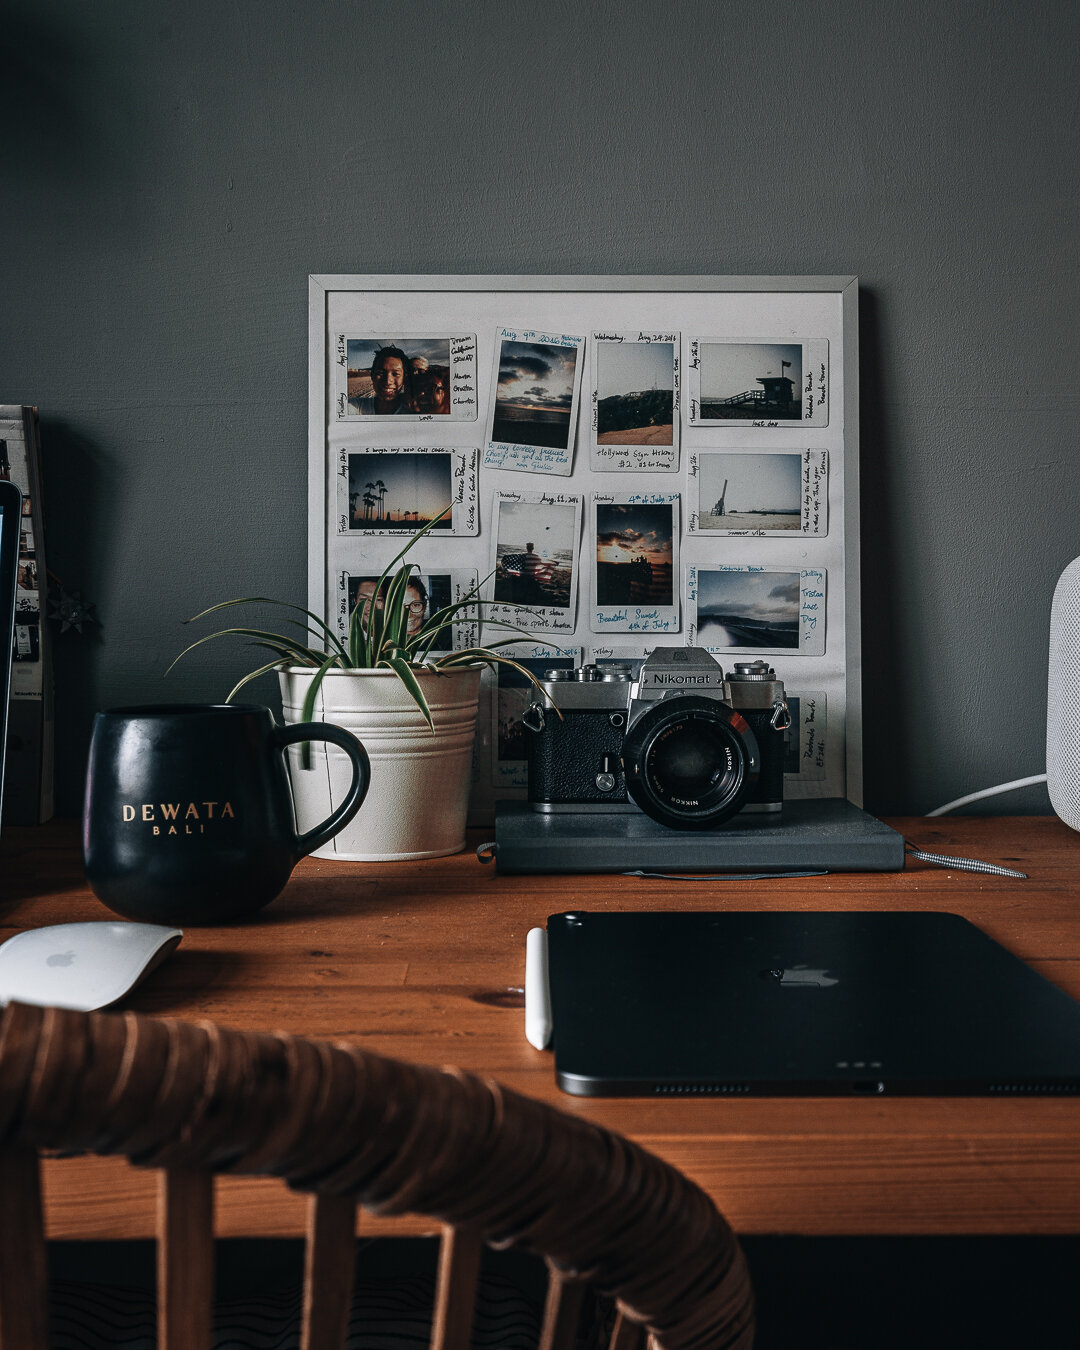
I took all the stuff out of my desk. Still, there is a flag I have been despondent to take down, which is an American flag with lots of signature and love messages signed from my dearest friends I made when I was studying in L.A in 2016. Even though I was really sad to take it down but a good thing for it was the flags' signature is fading away because of the sunlight, so yeah… it's time to take it down and keeping it for good condition. It means a chapter closing, but I'm fascinated by a new chapter with my new working space. My previous desk was from IKEA, and if you ever use the IKEA desk, you would have noticed it is not hardwood. Still, cardboard in between two thin wood boards and by that means, this desk won't hold up too well from time to time. I do a lot of crafting on my desk. I need a more reliable material for me to do things. Still, I want to have that warm wooden vibes, so this time I decided to choose hardwood/ real wood for my desktop. Oh yeah forgot to mention, I also changed the chair, the white chair you just saw, it was a nightmare to leading back and hurts my back so much so thank you next. After the measurements, I went to the woodshop to asking for what kind of wood I should use for the desktop. Funny was after visiting the woodshop I learned so much from them; before the visiting, I only knew a few types of wood and didn't know how every single wood's features can bring, this was such an educational visit! Oh yeah, I choose oak wood as my desktop.

If you want to know where I bought everything, except the photo prints which are my creation from the California road trip (well, if you want it, you can email me then I can sent you the files), old school camera made in the '80s which still works from my lovely granny, the pillow I bought from the time I was studying in England, the basket from H&M Home, and the custom cuts wooden desktop, everything are from IKEA…lol. All I want for this studio is to have something meaningful and somehow showcases my passion for traveling and photography, well… I think I did excellent jobs.

If you ask me how to find your style or find the style you want to do for your space when you start to do the renovation, I will break it down into five tips for you.
1. Establish a Color Palette
Set up what color you want to do and set up three primary colors that will appear in your project; this act can make sure your space won't look too busy and saturated. For my example, what do you think my three primary colors are? Yes, there are gray, white, and yellow(wood), but if you still want to throw some shade in it is fine just don't go too crazy, I also put some red in as my color to lighting up/ warming up space and bring some fun inside.
2. Channeling Home
Before I do the renovations, I always envision my space, such as my last studio-style. I was channeling Southern California because it was a tribute to the time I was studied there. When you think about California, you probably have a vision of bright color, palm trees, sand, and beach. I believe this process is the most important of all because it gives you a path of style space and makes you feel like you are there. And this time, I am channeling a cabin in the forest setting up a fire in the fireplace with the foggy, rainy weather in Vancouver.
3. Use Pinterest
After finishing the imagination processing, I used Pinterest to set up a mood board to make my vision a reality. I highly recommend to use Pinterest, the more you click on one picture you like or save, the more you sure what you love.
Oh! Encase you want to do the same wall color as mine, the color code for the moody gray wall is #NN1370-3.
4. Mixing in Memories & New life
To make your space feel more personal, you are definitely to throw some photos inside. As a photographer, I put lots of my creation inside, especially the picture I took from my California road trip with my friends and lots of the polaroids I received from the time I was studying in L.A in 2016. It makes them just a memory, but unique artwork is the best way to decorate the space rather than by the artwork from the store or online. This act makes your art more meaningful and appreciates your photography skills.
5. Adding Plants
Adding plants as a final touch is a great idea. Without putting a plant indoor, the room feels freezing for me; I love to put a least one indoor plant in every place. The plant usually doesn't have a shape. I think because the object we often have has the edge, I do feel the plant makes everything blend well, also putting a plant indoor makes you think the room has always had the fresh air.

All The Furniture I Used
Thanks for reading!